
Wake Windows or Schedules?
As adults with set work times, school pick-ups, and appointments, we tend to yearn for set schedules, but do set schedules really make sense when it comes to pediatric sleep? A schedule can be a good tool for understanding what your child’s day could look like, based on developmentally appropriate wake windows, but it’s important to be flexible with your schedule, understanding that our kids are not robots, and not every day is going to look the same. When we force a schedule sometimes we create more of a bedtime battle for ourselves by asking an undertired or overtired child to fall asleep easily, when they just won’t be able to. Let’s look a little closer at how wake windows work, and how you can use them to optimize your child’s sleep.
What is a Wake Window?
A wake window is the amount of time that your child is developmentally able to stay awake. Wake windows start really small (as little as 20 minutes for a premature infant, and 45-60 minutes for a newborn) and gradually increase over the first few years of your child’s life (for example your three your old has a wake window of 6-7 hours). Wake windows are based on averages, so you can expect some variation, which is why it’s important to spend some time observing your child and learning how they cue their tiredness.
What is a Sleep Gate?
When a child is put down for a nap or bedtime as their natural wake window is closing, and there is adequate sleep pressure (meaning they’ve spent enough total time awake to be sleepy), they should fall asleep without much fuss, and within about 15 minutes. When you get the sleep pressure and the wake window just right, this is called a sleep gate!
Common Mistakes when using Wake Windows
Wake windows are often mishandled in the sleep world, and therefore can get a bad rap, but if you get them right, it makes the job of helping your child get to sleep so much easier! Here are some common mistakes to avoid
Using too large a wake window (I find parents often transition to a longer wake window too soon! Anytime they see troubles come up with naps they assume it's time to lengthen the wake window or lose a nap, which isn’t necessarily the case. It could be a regression, or maybe if you missed some sleepy cues and your baby is actually overtired
Wake windows are calculated based on when the baby was taken out of their crib, rather than when the baby actually woke up (if you are practicing some of the more common nap training techniques, you have probably been told to start your wake window when you take baby out of crib, instead of using actually sleep time)
Wake windows are used “as is”, without the parents getting curious about their own child’s sleep cues and daily patterns. Remember the windows are averages. You should log your child’s sleep for several days to determine what window is best for them. Are they consistently getting fussy before you actually put them down for a nap (they probably need a smaller window), are they taking longer than 15 minutes to fall asleep on a regular basis (they probably need a larger window)
How to Make the Most out of Wake Windows
Use the shortest wake window in the morning, and the longest in the stretch right before bed
Once your child gets down to one nap per day, use the longest wake window in the morning, and reserve the shorter one for the stretch right before bed
Be a little flexible! If your child is sick, or had a rough night, you’ll probably want to shorten their windows for that day. If you have to schedule their nap around an immovable appointment for the day, understand that you may need to provide more support for that nap if a wake window is pushed, or get creative and plan for a nap on the go
Always let your baby lead the way with their patterns to determine when to stretch the window. Just because your child turned 7 months on the calendar, doesn’t necessarily mean they are ready to move from 6 month wake windows to 7 month ones, let them show you based on their patterns of getting to sleep over the course of about a week.
Start your day (as far as wake windows are concerned) at 6am, even if your baby wakes up earlier.
Why I Personally Prefer Wake Windows Over Schedules
Wake windows are more realistic and meet babies where they are developmentally. They make our job as parents easier, because babies are ready to fall asleep when we honor their wake windows, rather than trying to force them to sleep when they are over or under tired. Rather than a rigid schedule, wake windows allow some flexibility for dealing with things like illness, a short nap that day, a late start, etc. I know it is super tempting to print out a schedule, put it on your fridge, and try to live and die by that schedule, but if you get a knot of dread in your throat every time it's time to enforce naptime, you probably need some wake windows in your life! Does that mean you can’t have a schedule? Not really ( I even provide sample/ideal schedules in my packages) , you can have an ideal schedule based on appropriate wake windows, you just have to understand that you probably aren’t going to hit that exact schedule every single day. The good news is, when we get wake windows right, and are consistent in using them, you will likely see a natural schedule start to form.
If all of this has your head totally spinning, book a free consultation! We can talk about your sleep challenges, ideal wake windows, and ideal routines for your child. This can all get pretty confusing, especially when you yourself are tired; but you don’t have to figure it all out on your own! Schedule now at https://calendly.com/slumberbunnies/discoverycall

6 Mindful books to share with your children
When we start talking about toddler and “big kid” sleep, we really can’t work on optimizing sleep until we’ve worked on regulating emotions, and handling big feelings! One tool I love for this is the practice of mindfulness. It can really impact sleep positively in all the age groups, because parents who practice mindfulness pass that calm onto their children through co-regulation.
What is Mindfulness and How Can it Relate to Sleep?
In a nutshell; mindfulness is the practice of being present in the moment without worrying about the past or the future, and it’s something that most of us really struggle with. Just think about it. When was the last time you laid down in bed without replaying an event that didn’t go exactly as you had planned that day, or stressing over your to-do list for the upcoming day? Some of us have an easier time than others letting go of these thoughts and drifting to sleep, and it’s the same with our kiddos. That’s where the practice of mindfulness can be super helpful. Focusing on the soft feeling of the sheets on our bed, counting breaths, or visualizing a “happy place” are all practices that can help ease anxiety and allow us to sink more readily into a deep sleep.
Six Books for Introducing Mindfulness to Children
King Calm: Mindful Gorilla in the City by Susan D. Sweet and Brenda S. Miles, and Illustrated by Bryan Langdo
Marvin’s Grandpa wants to roar and beat his chest all through the day, and doesn’t understand his grandson’s slow pace. Marvin takes his grandpa on a journey through the city to help him understand how to savor all of the sights, sounds, tastes, smells, and feelings of the city; ultimately helping his Grandpa understand that it's cool to be calm. This is a really sweet picture book that’s perfect for teaching your little one the importance of slowing down and noticing everything around us. A good reminder for parents to take their noses out of their phones and be present as well.
Mindful Bea and the Worry Tree by Gail Silver, and Illustrated by Franziska Hollbacher
Bea is having a birthday party, and her friends are about to arrive! But instead of excitement, Bea feels anxiety! Her anxiety is like a tree that grows more and more branches as her thoughts multiply. Finding a quiet and calm place to take deep breaths helps Bea tame her worries and come back to the joy of the present moment. This book is great for helping children understand anxiety, which can be a complex feeling to talk about. It introduces the tool of deep breathing, which is a wonderful practice to add to your bedtime routine, and use all throughout the day.
Mindful Mr. Sloth by Katy Hudson
Sasha has one speed and it’s FAST! She rushes from one activity to the next, sometimes abandoning activities before she’s even had a chance to truly enjoy them. The Mr. Sloth comes crashing into her life and forces her to slooooooow dooooooown. At first she struggles to accept a slower pace, but eventually she realizes how much she was missing out on by zooming through life. This book is perfect for the kid who never sits still, but it also speaks to the kids who has been overscheduled, and become used to a rushed pace of life. It’s a great reminder to families to take time to slow down and enjoy the little things. How can you slow down you bedtime routine, or your evenings in general? What can you do throughout the day to prioritize simple moments together?
Breathe like a Bear by Kira Willey
This book is a treasure trove of activities to help you practice mindfulness with your little one. It’s split into categories with activities to help you find calm, practice focus, practice imagination, make energy, and relax. I would highly recommend utilizing some of the calming and relaxing activities into your regular bedtime routine. Always remember to practice mindful activities when your child is already happy and calm. Practice them often enough, and they will become tools you can use when your child is elevated.
Bee Calm; The Buzz on Yoga by Frank J. Sileo, and Illustrated by Claire Keay
Bennett the Bee notices all of his friends practicing yoga poses. At first he’s confused, but his confusion turns into curiosity. Finally, he tries out some poses on his own, and gets educated about the benefits of yoga for the mind, body, and spirit. This book makes a great introduction to yoga practice for kids and incorporates some poses you might want to try out. The yoga poses aren’t illustrated in a way that is super instructional, so you might want to utilize YouTube or some other venue to look up the poses and practice them with your little one, if you are new to yoga yourself. Adding some yoga poses to your bedtime routine can be a good way to stretch the body and calm the mind before bed!
I Am Peace; A Book of Mindfulness by Susan Verde, and Illustrated by Peter H. Reynolds
This lyrical book shares how mindfulness can help still our worries, and leave us more open to share love and peace with others. It illustrates how using breath and our five senses can calm us and help us feel more grounded in the world around us.
Working on Healthy Sleep with Toddlers and School-Aged Kids
We can’t address healthy sleep for toddler and school-aged kids without addressing the emotional and mental health of our children. Adults and children need tools to sort through big emotions and decompress after busy days and stressful events. Practicing mindfulness together is a great way to build connection and calm; ultimately laying the foundation for better sleep.
These are skills we can work on within my toddler and school aged sleep coaching packages. You can learn more by booking a discovery call at https://calendly.com/slumberbunnies. Or visit www.slumberbunnies.com/sleep-packages to explore sleep packages.

Slaying your Baby Registry
When you are expecting a baby for the first time it’s easy to get overwhelmed planning your registry; there are so many products marketed towards first time parents and it’s hard to know what you really need! I’m here to offer some guidance with some of my most-loved items that I used with my babies. I’ll also provide some ideas of what to SKIP!
Baby’s Best Sleep:
Halo Swivel BasiNest- This bassinet sits snug to the bed, and can be adjusted by height so that your baby is literally close enough to touch, but still in their own separate sleep space. The swivel action makes it easier for you to get in and out of bed as you breastfeed, do diaper changes, and get up to pee yourself! I did not have this bassinet with my first child, and I really wish that I had. It allowed me to room-share much more comfortably when my son came along. Don’t worry about buying the more expensive model with built in “soothing” sounds and vibration. Those features aren’t necessary. An old model is fine too. We bought out BasiNest second hand for $75! Checkout your local Facebook Marketplace, and you can usually find plenty of gently used options, after all baby will outgrow this somewhat quickly.
Halo Swaddle Sacks- There are so many brands of swaddles out there, but these have always worked great for our family. We had some cotton ones and some polar fleece ones since both our babies were born in the fall/winter months. These swaddle sacks are less complicated than trying to use a swaddle cloth to swaddle your baby every time, and they transition nicely into a regular sleep sack for when baby starts to roll.
The Hatch- this is a nightlight and sound machine that will follow your child all the way into teenhood, honestly! Because of its simple/sleek design it’s not baby-ish. It offers a variety of white noise and nightlight options that are really customizable. You can create custom schedules as well. For your infant you may only need a simple night light for nighttime feeding and diaper changes, and the white noise, but as your child grows you’ll be able to use the light as a “time to sleep/ready to wake” clock for your toddler, and even a gentle alarm clock for your school-aged kids. You can control it from an app on your phone as well as manually, and I love being able to adjust my children’s white noise and light settings without having to go into their rooms.
Graco Pack N’ Play- The pack n’ play makes a perfect safe sleep space for anytime that your baby needs to catch some zzz’s but aren’t able to do so in their nursery. This is great for traveling, but also awesome if you want your newborn to nap within eyesight as you do household chores or enjoy a nice day outside. The pack n’ play is also a good “play-pen” for your child as they begin to crawl. It provides a safe place for them to play when you need to step out of the room for a few minutes.
The Slumberpod- this is a great blackout option for traveling. It's sort of like a tent that goes over top of a play-yard or mini crib, and creates a perfectly dark environment for sleep. It’s great if you are sharing a hotel room with your family, or if you need to get your child to sleep in a bright room. It even has space for the monitor so that you can still get a visual of your baby while they sleep, and it includes space to place a small fan if you are concerned about your child overheating in a warm environment.
Room Darkening Curtains and Blinds- You will want to have room darkening curtains in the nursery, and also in your own bedroom, if you plan to room-share with your infant for an extended period of time. I recommend the options below from Amazon because they are fairly inexpensive and work quite well. I also like that they aren’t made out of questionable materials like vinyl, which could cause off-gassing concerns.
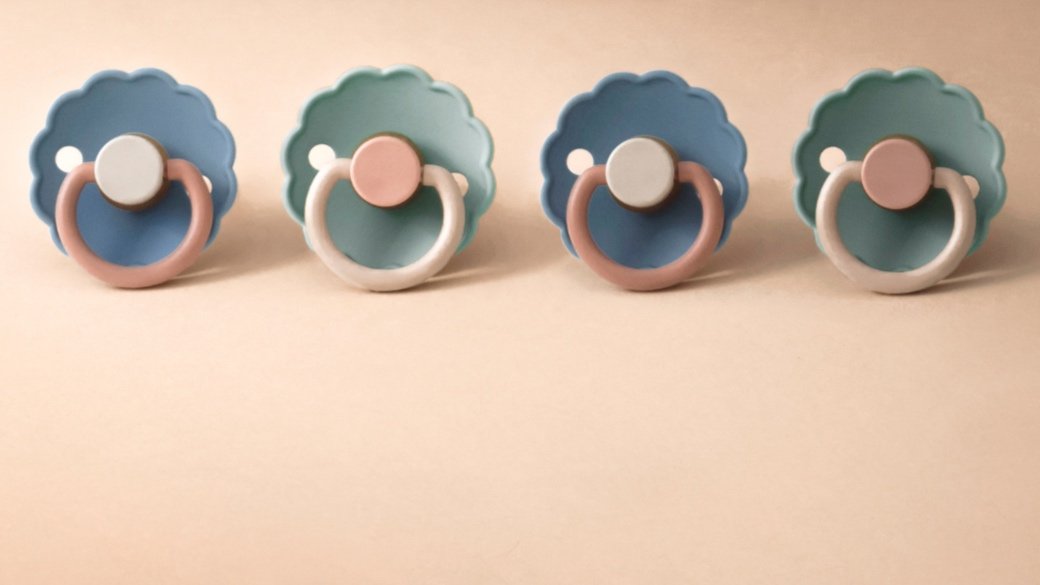
MAM pacifiers- I support the use of pacifiers for babies from 0-4 months. We always like the MAM brand the best. We used these for the first month or two, and then switched to these once the baby got to be about 8 weeks old. A pacifier was a great source of comfort for my son especially, who struggled with gas and reflux; it definitely helped him get better quality sleep.
Zippered Sleepers- I love these ribbed ones from Carter’s. Fairly inexpensive, organic cotton, zippered; with a 2-way zipper for easy diaper changes, and the fabric on these stretches so I find that they fit the baby for longer, and are super cozy.
Sleep Items to Skip:
The Snoo- The Snoo is a “smart” bassinet designed to soothe your newborn. Not only does this thing cost thousands of dollars, but your baby will grow out of it quickly and then have some serious sleep crutches to break. As a sleep consultant, I warn parents away from hitting the “easy button”, because it will make life harder in the long-run, especially when it comes with such a high price tag.
Weighted Sleep Sacks- the most popular of these are the Dreamland weighted sleepers. I don’t recommend them because they are not safe. In official statements from the American Association of Pediatrics in 2022, weighted sleep sacks were not recommended due to a possible increased risk of SIDS. Similar to swaddling too tightly, the weight of the sleepsack can impair infant arousal systems that protect against SIDS.
The Owlet Smart Sock- Hypothetically, this smart sock measures the baby’s oxygen levels and heartbeat while they are sleeping and is connected to an app on your phone. It alerts you when readings are “abnormal”. Unfortunately, incorrect reading frequently lead to false alarms, increasing parental anxiety and causing paranoia…the opposite of the peace of mind it’s supposed to provide! Just get yourself a good monitor and use it as needed, skip this pricey item that will only add an extra layer of stress to your life with a newborn.
Dock-A-Tot (and similar products)- The bottom line is these “nests” for baby are not safe for sleep, but that is what they are primarily used for. Use a pack n’ play or other play-yard if you need a safe space to lay your baby during the day. The truth is, you’ll be tempted to let your baby sleep in the dock-a-tot, but it's just not worth the suffocation risk, so skip it altogether!
Feeding Favorites:
My Brest Friend Pillow- I tried the boppy pillow, but it didn’t really provide the support I was looking for. This pillow provides great support, is adjustable to your body, and has a pocket perfect for storing breastfeeding snacks, your phone, lanolin, whatever you might need! They also have a pillow designed for multiples.
Kindred Bravely Nursing/Pumping Bras- These bras are designed for nursing and pumping, so you don’t have to change your bra when you need to switch from one to the other. I tried a lot of pumping bras, since I had to pump multiple times a day after returning to work with my first child. These Kindred Bravely bras are supportive, comfortable, and work really well. Although they have a bra specifically designed to be a Sports Bra, I found even the basic bra was supportive enough for a workout, or a long walk. I really enjoyed the lounge bra for casual pumping while still on maternity leave with my son.
Dr. Brown’s Anti-Colic Bottle- These bottles are designed to reduce gassiness, which for my colicky baby boy was a must! My daughter would take any old bottle, and we actually used a few different brands with her, but if you have a reflux or colicky baby, you’re gonna want to get the Dr. Browns!
On the Go w/ Baby in Tow:
The Moby Wrap- This super simple wrap is just one large piece of fabric; that’s it! Once you get the hang out of wrapping it (there is a bit of a learning curve!) it becomes very easy to use. I loved how it snuggled my babies right up against my chest. My babies did a lot of contact napping in the Moby while I was able to get some other things done. For my colicky son it was one of the only things that calmed him down quickly. For nursing mamas, wearing your baby close (bonus points for skin to skin!) can help establish and boost your milk supply. This is my go-to baby carrier for the 0-3 month age range.
The Ergo 360 w/Infant Insert- The Ergo is very comfortable for you and your baby, and is super adjustable to your body. The infant insert makes it usable with a newborn, but you’ll likely be using this carrier all the way through the first year of your baby’s life. This is a great sturdy carrier for going on walks and doing more rigorous chores around the house. It also has a sunshade feature.
Graco FastAction Jogger- First of all, there are a lot of super expensive jogging strollers out there. Most of them start at $500. This jogger is below $200, and its Graco, so it includes click connect technology to incorporate a Graco car seat, should you choose to purchase one. I really like Graco products. They are moderately priced, dependable, and unpretentious! This stroller has seen so many miles in our household, some of them walking miles, some jogging miles, and even some all out running miles (mostly with my husband). It has gone over all kinds of terrain, city, trail, grassy, and it has held up so well! If you have your heart set on a jogger, but aren’t ready to fork over $500 plus, this jogger is the one for you! Even if you don’t plan to jog with your stroller, I still recommend purchasing a jogger. The big wheels are just so much more practical on all sorts of terrain, and it makes strolling so much easier. Bonus points for having a large cargo area for stowing away the diaper bag, extra coat, and even your farmer’s market haul.
Little Things that Go a Long Way:
Baby Wash Clothes- this is something that I never thought to put on my registry, but should have. Luckily one of my mom friends bought me a huge pack of them without me having to ask. These soft clothes are perfect for washing tiny faces and hands, and you’ll be using them for cleaning plenty of snotty noses as your infant turns into a toddler. I linked the Cloud 9 Target brand here, but the brand doesn’t really matter.
Burping Clothes- if there was ever something to buy in bulk it's a burp cloth! If your babies are anything like mine there will be plenty of spit-up to contend with, and you’ll live with one of these on your shoulder (and draped over every piece of furniture in your house) for at least the first 6 months of your baby’s life. Technically what I linked is a swaddle, but I liked to use these soft muslin swaddles as burp cloths because they offer more coverage (to protect your clothes) than a traditional burp cloth. You can also use them as a light blanket that’s useful in draping over the carseat or putting on your baby’s lap when you’re out and about. My daughter who is three, still likes to play with these and carry them around as well, so it’s nice that they double as a lovey blanket. Of course any old burp cloth will do. I have a bunch of different brands and types that have been handed down to me from other moms, so don’t feel like you have to be choosy.
Zutano Baby Booties- One thing that might surprise you as a first time parent is that baby feet eject socks. I’m not sure why this is, but it is nearly impossible to keep a sock on your newborn’s foot. That is why I adore these booties! They actually stay on! I like the cotton ones for everyday use, and the polar fleece ones are perfect for stroller rides on a cooler day. It’s definitely worth adding a couple of pairs of these to your registry.
Worth the Splurge:
We’re a middle class family without a ton of spare cash to throw around. Most of my recommendations are moderately priced to suit our budget. However there were a couple of areas where we splurged and it was worth every penny.
The Stooke Tripp Trapp High Chair- this highchair (and its accessories) is the Cadillac of high chairs, especially if you plan to use the Baby Led Weaning methodology for introducing solids. The most awesome thing about this chair is that it endlessly grows with your child. The height can be adjusted to perfectly line up with your table, so your baby can easily use the table top in lieu of a tray if you desire. As they grow taller the chair can be adjusted so that you never need to buy another product, such as a booster. Eventually this chair just turns into a regular adult chair, which is pretty cool. The chair with the “baby set” (which is what makes it a high chair) will run you $300, plus a little extra if you wish to purchase the cushions that go with it. When my son was born, we invested in a second Tripp Trapp and also purchased the Newborn Seat which can be purchased separately for $149 (we bought ours second hand for $75 on Facebook Marketplace). I was surprised by how much we used the newborn seat. My son spent a lot of time in it during his first few months of his life; allowing us to be together as a family at the table. He also enjoyed snoozing in it as a newborn (under supervision of course). We have a silly romantic idea of sending our kids off to college one day with their “highchairs” now transformed into adult chairs, and someday using those same chairs for their own kids. If you think of them as heirloom pieces, are they really so expensive?
The Baby Bjorn Bouncer Bliss Seat- I know what you’re thinking $210 for a simple bouncer seat? But hear me out. This thing is awesome. One, the seat is removable and completely washable. Two, it’s super comfy for your baby from birth all the way through to about 18 months of age (it actually turns into a “toddler seat” if you flip the seat over and attach it in reverse). I love that as your baby grows they can bounce this on their own by kicking their legs. I love that it doesn’t have annoying gimmicks like lights and music (your baby does not need all that artificial stimulus, trust me). I love popping my babies down in this bouncer while I eat lunch or vacuum the living room, and the best part is they seem to enjoy it too! I have used this every single day multiple times a day for both my babies, and it has been worth the price (the fact that it was gifted from my registry doesn’t hurt either ;) )
An Organic Mattress w/ Greenguard Gold Certification- When you purchase a mattress for your baby, it’s worth it to invest in an organic one. Your baby will be snuggling up against that mattress night after night, and you won’t want them breathing in any harmful chemicals or toxins. We used this mattress from Organic Dream, and it runs about $200, but there are plenty of reputable brand out there with that meet the Greenguard standards, so just do a little research before you choose a mattress for your registry.
Sleep Knowledge and Support from Day 1:
I hope this gave you some insight to help you craft the perfect registry for the arrival of your sweet baby. I couldn’t be more excited for you! If you want just a little boost of confidence for guiding your newborn into healthy sleep from the start check out my Newborn Support Package at slumberbunnies.com/sleep-packages; or better yet, add it to your registry and let a loved one pick this one up for you! The package includes my Newborn Sleep Foundations Guide, an hour-long educational call with me, to be used anytime within your child’s first three months of life, and 10% off a future sleep training package.
The pacifier Debate
When it comes to healthy sleep foundations, many parents wonder if offering a pacifier to their infant is a good choice. There are pros and cons to using a pacifier with babies. In this blog post, I will go through the benefits and disadvantages of pacifying, how long I recommend using a pacifier, how pacifiers impact sleep training, and ways to eliminate pacifier use if that is your wish.
Pacifier Pros and Cons
Pacifiers come with pros and cons. The way I see it, most of the benefits of using a pacifier are for babies aged 0-3 months. After three months the benefits become reduced, while some of the disadvantages become clear.
Pros
According to the American SIDS institute, “Several studies have found a lower risk of sleep-related death when babies use a pacifier.” (sids.org) They also note that breastfeeding mothers should wait to introduce the pacifier after breastfeeding has been well established.
The pacifier is a powerful soothing tool, as sucking is a natural pain reliever for infants. My son experienced a lot of bad gas due to to some feeding issues related to tongue tie early in life. The pacifier was a huge tool for us in soothing him. Dr. Harvey Karp includes “suck” as one of his 5 S’s for soothing newborns.
Pacifiers are a natural pain reliever, and a good alternative to using medications to relieve symptoms like gas and colic.
Pacifiers are relatively inexpensive to buy and come in many varieties, our favorite has always been the MAM, but I recommended trying a few different brands to see which your baby prefers.
Cons
Pacifying before breastfeeding is well-established can have a negative impact on your milk supply. (Anecdotally I have NOT found this to be true for either of my two children, who were both given pacifier night one in the hospital! My supply was just fine.)
The pacifier can quickly become a sleep-crutch if your baby requires you to “replug” their pacifier every time it falls out of their mouth
Long-term use of pacifiers can lead to dental issues in the future
Pacifiers with any sort of attachment, such as a lovey or clip that is put on the child’s garment, are unsafe to use for sleep
Babies that have not yet developed the pincer grasp (typically developed around 8-10 months of age) are unable to “replug” their own pacifiers, and even those with the grasp may not be able to find their pacifier in the night, or may simply be too agitated to “replug” it without assistance
To summarize, a pacifier can reduce the risk of SIDS and is a great soothing tool, especially for infants from months 0-3. After 3 months a pacifier runs the risk of becoming a sleep crutch, leading to multiple night wakings when it falls out of your baby’s mouth.
Sleep Training: Can it Be Done with a Pacifier?
My general recommendation is to eliminate the pacifier when sleep-training, because I find it really does lead to better results. However, you are the parent, and as always, you get to decide! For babies that are too young to learn to replug their own pacifier, we can put them down with their pacifier, and we can either a) not replug it at all when it falls out b) replug it once c) only replug it after an established night-feeding session. Not replugging it at all will usually lead to weaning the pacifier altogether, and is my best suggestion if you do choose to keep the pacifier. However, if you have a little one that uses the pacifier to help cope with gas pains, or the like, you may prefer a gentler approach and offer to “replug” the pacifier within the sleep-training plan.
For children with the pincer grasp, we can teach them how to replug their own pacifiers during the day. We can practice by placing pacifiers in their palm and teaching them to bring their hand to their face to replace it. This is a skill that should be practiced a lot during the day, so that it doesn’t become a sleep disturbance at night. Many parents also find it helpful to place many pacifiers in the crib, so that when the child wakes up, it’s easy for them to locate one and replug it. They even make glow in the dark pacifiers that are easier for you babe to spot in the night!
While it is possible to teach older babies to replug their pacifiers, it is still my best recommendation to sleep train without it. As your child ages they will become more and more attached to it, and it will be a lot harder to break them of it. Long-term pacifier use can lead to dental problems later down the line.
The good news is that every child has built in pacifiers; all of their lovely little fingers. When my daughter picked up thumb-sucking at 4 months of age, she quickly abandoned the pacifier and became a much better sleeper. After all, you can’t lose your thumb! Thumb-sucking of course has its own set of problems, and can also lead to dental issues, but oftentimes children naturally wean from thumb-sucking by the time they are ready to start school.
Eliminating the Pacifier
As Kim West “The Sleep Lady” puts it, there is no gentle way to wean the pacifier; it’s either in their mouth or it’s not. One suggestion is to cut the pacifier cold turkey. Throw it away and put a hard-stop on pacifier use during the day, and at night. For older toddlers, you can even explain why you are throwing it away, and you can make it very clear that the pacifier is not coming back. While this may seem cruel, the more clear you can be with your child, the quicker they will move on. If you let them have the pacifier sometimes, but not other times it will just be confusing and lead to more protesting. Some people like to enlist a “pacifier fairy”; they have a guest visit the house and collect all the pacifiers to give to other little babies out there who don’t have any. If you prefer this more whimsical approach to cutting the Paci, go for it! I’ve always preferred a more no-nonsense style when it comes to these things, but you should pick the approach that feels right to you.
Some parents opt to remove the pacifier for nighttime sleep, when the child has more time to practice self-soothing and get to sleep, while keeping it for daytime sleep, since there is less time in a nap to get to sleep, and the help with soothing might be worth it. You can try this, but you may find it’s too confusing for your little one.
My take, if you decide it’s time to eliminate the pacifier for the good of your little one, then just eliminate it! The more quick and clear you can be with this process the easier time your child will have moving on.
Summary
Pacifiers can be a good option for babies under 3 months. If you can, eliminate pacifier use around 4 months of age. If your child is 8-10 months old and you have not eliminated the pacifier, you can train them to replug their own Paci! However, the older your child gets the more difficult it will be to break this habit in the long-run. For best sleep-training results, ditching the Paci is my personal recommendation, and I usually opt to go cold-turkey! Like I always say, you are the parent, and you get to decide! My sleep-plans are always customized to you, so it’s something we can discuss more as we build out your plan!
Are you struggling with sleep crutches like pacifiers? Book a free discover call at calendly.com/slumberbunnies, and view package options at slumber bunnies.com/sleep-packages.

Transitioning to a “Big-Kid” bed
A deep dive into transitioning a child into a “big kid” bed.
Today’s blog post is a deep dive into everything we did to help our daughter transition into a “big kid” bed. We moved our daughter into her big bed about three weeks ago, and I want to stress that things aren’t perfect, but I feel really proud of the progress she’s made in that short time. I’m going to walk you through the through process behind why we decided to move her into her big bed, what we did to prepare, what supports we have in place to help her sleep independently all night long, and some of the bumps in the road we’ve experienced along with what we did to troubleshoot them.
It’s Time
The first time we foolishly tried to move our daughter into her twin bed was in the winter of 2023 when I first found out that I was pregnant with our second child. I had heard that if there are any big changes you want to make with your first (potty training, transitioning to a big bed, etc) you should do it months in advance of the due date of your second child, so that you’re first child isn’t all the sudden dealing with a ton of big changes at once. Therefore, I decided it would be a good idea to get Imogene sleeping in her twin, so that we could have the crib for the baby. This was a HUGE mistake. Imogene was not ready for this at all. It resulted in fear and discomfort on her part, and a lot more night wake ups for us. We quickly abandoned ship, and luckily hadn’t taken down her crib or anything, so we just put her back in her crib, and moved on with life. If you are expecting a second child, hear this, do not take your toddler out of their crib if they are under three years old. They are not ready! Get a crib secondhand if you are worried about the expense, or let your baby sleep in the pack n’ play with a sleep-safe mattress. Most babies room-in with their parents for the first 2-6 months of life anyways, so please for your own sake, do not move your toddler out of her crib. The crib we bought second-hand on facebook marketplace, was well worth the money. It took the pressure off and allowed us to all sleep better. It also allowed the transition to be led more so by our toddler than by us.
Fast forward to 2024, and my toddler has just turned three. Three is kind of the magic age where moving to the big bed becomes a reasonable idea, but some kids aren’t ready until closer to four. At three your child may have developed enough to begin to understand restraint and when they can and can’t get out of bed. This is still a huge skill for them to tackle though, and not every toddler will be ready just because they hit three. For us, there were three big factors that impacted our decision to make the switch. 1) Imogene, who has been potty-trained during the day since she was 2.5, began to express a desire to use the potty at night, and would sometimes cry for us at night so that we could help her go to the potty. Up until this point we just put her in a diaper, and she slept through the night and usually woke up with a wet diaper. Now if she wet her diaper she was becoming upset. 2) We’ve got a tall girl, she’s in the 90th percentile for height for her age, and quite frankly that crib seemed a little cramped; we wanted her to be comfortable. 3) Girl’s had three years to collect stuff, and her most recent stuff, such as a huge doll house she got for her birthday, were taking up a lot of space in our living room. Along with new baby stuff, our living room was getting pretty cluttered, and we wanted to relocate some of Imogene’s things into her space, making her room more of an independent play area during the day.
Preparation
Rick and I mulled over the transition for a while and then started talking to Imogene about it. She was pretty excited by the idea of moving some of her bigger toys into her room, and the idea of being able to get up to go to the potty; the real cincher was Nana taking her out to pick out some new patterned sheets for her big girl bed. If you are planning your own switch, and you have the funds to do so, it’s definitely a good idea to take your toddler out and let them pick out some exciting new bedding. This gives them ownership over their bed and amps up the excitement.
The next thing we did was remove the box springs from her twin bed. We got a simple set of wooden slats to put under her mattress in place of the box spring. This lowered her bed considerably, so that falling out would be less of an issue. We also moved the bed into the corner, so that there was only one side she could fall out of. We opted not to add a toddler rail, although you certainly could, but we just decided we wanted her to learn how to sleep in a bed without anything extra. Notably she has not fallen out yet. I think because it’s so much bigger than her crib was, she just doesn’t move enough at night to fall out (knock on wood). We made a big deal about involving her in lowering her bed and taking down the crib, which we did all in one day. We knew if we didn’t take the crib down she would probably end up back in it after a few of those middle of the night wake-ups. Just like when we potty trained and went straight from diapers to undies (not pull ups or training pants), we decided to go straight to the bed, full stop.
We also took the time to double check the safety of her room. Her furniture was already anchored into the wall, and electrical cords were tucked behind furniture where they could not be reached by her, we also made sure we had plastic covers over the outlets. Toys with small parts that could be choked on were put away on top shelves in the closet, or on top of her tall dresser which she couldn’t reach. We also removed two stools that were in her room, so that she wouldn’t climb on them. Safety-proofing the room is so important. Accidents are still the leading cause of death in young children, and after the crib is removed we have to treat the whole room as a crib. Some parents may also choose to remove toys from the room if their child has a temperament where they are tempted to get up and play in the night. That has not been the case with Imogene so far.
That first night we didn’t change too much else. We already had a “ready to wake/ready to sleep light” in place, and we already had a bedtime routine checklist, and bedtime cue-cards in place, so her routine was really similar. We did place a night light in the bathroom, and equipped her with a flashlight for potty trips. We practiced what it would be like to get up to use the potty at night. We put her to bed in a pull-up still because we didn’t want her to be worried about having an accident.
Troubleshooting Bumps in the Road
The first few nights went surprisingly smoothly, we checked on her a few times after putting her to bed, and she fell asleep pretty quickly. She did get up to use the potty and then often needed a little help from us getting through that routine and getting back in bed, but once she was in bed, she did pretty well. Probably around night three things started to go down hill. My guess is the novelty had worn off, and she realized she had this newfound freedom. Several issues arose. I’m going to lay out each problem and what we have done to troubleshoot them.
Getting out of bed several times right after being tucked in: Imogene began to pop out of bed as soon as we tucked her in, and would do this 3-4 times. Her 7:45-8pm bedtime was starting to turn into a 9:00 pm bedtime.
Check-ins: In order to fix this we decided to check in on her a TON! I reiterated to her that her job is to lay in bed, close her eyes, and try to go to sleep. My job is to come in and check on her. She didn’t need to get out of bed to find me, because I would be going back in to see her. Check-in’s are hugely important when transitioning into a big bed. Make sure you start your check-in’s quickly after the tuck in, think 30 seconds! Then stretch out your check-ins to 2 min, 5 min, 10 min. Etc. until your child has fallen asleep. Keep those check-ins brief. We’re not coming back in and going to the bed to sing another song or give more hugs. I like to hang out by the door and just whisper “I love you, you’re doing great! Mommy will be back in five minutes” or something to that effect. If you feel like your kid is about to drift off to sleep, don’t check in right away! You don’t want to actually delay them falling asleep by checking in too often, or making your check-ins too disruptive. On another note, she began to ask us to leave the door cracked, and we agreed to do this, which did cut down significantly on the amount of times she popped out of bed.
Fear of the Dark: Most of the time when Imogene would get up at night her main complaint was being afraid of the dark. Nightlight: While she had always slept in a completely dark room in the past, we decided to implement a dim night-light. We kept her hatch glowing red on a lower percent, and added in an orange night light with a dim setting. The night light seemed to ease her anxiety of the dark enough to help her fall asleep more quickly. If you are using a nightlight make sure you use orange or red light rather than a white or blue light. Keep it dim. A brighter night light can actually cast shadows which can make the room look more intimidating. In addition, bright lights can disrupt natural hormone production needed for healthy sleep and development. On another note, we did end up removing the flashlight from the room, which became a toy in the night!
Extra Comfort:We also added in some support items for extra comfort. For example, I found a soft double picture frame and put family pictures in it so she could look at it at night. We also let her choose one of her dad’s t-shirts from the drawer to have in bed with her. In addition, we practiced “a middle of the night wake plan”. Her plan if she woke in the middle of the night was to take a deep breath, hug one of her loveys or her daddy’s shirt, and tell herself “I am safe”. Then she should try to close her eyes and go back to sleep. We practiced this each night before bed.
Waking Up Early: In the past, when Imogene awoke early, she’d be in her crib, so she really had nothing to do but fall back asleep. Now, when she awoke early she had the opportunity to get out of bed, which she did! For these early morning wakes we implement two new things.
Okay to Read Light: We added a new light to her Hatch system; she picked out the color blue. The light turned blue 15 minutes before it was okay for her to leave her room. During those 15 minutes she was allowed to turn on her lamp and read in bed. When the light turned green she was allowed to get up for the day and leave her room. Oddly enough she does not usually do anything when the light turns blue, but I do think it signals to her that the green light is just around the corner and allows her to practice a little extra restraint to stay in bed, since she knows it won’t be for long.
Incentives: We also put together some incentives. If she stayed in room until the light turned green she got a penny to put in her piggy bank, and a sticker to place on a chart. For a bigger prize, we started at three nights, every three nights she earned a sticker, she could pick a larger prize. We happened to have a bunch of small toys squirreled away from random events and holidays and she could pick one of these (for example when our son was born a lot of folks brought small gifts for Imogene, some of these we stowed away for later, we also had things like chick-fil-a happy meal toys, and old party favors we stowed away. You can also create a little treasure box of prizes easily and affordably). We also set a goal for ten nights. If she could stay in bed til the light turned green for ten nights, her father would 3D print her a trophy.
How it’s Going and Additional Thoughts
Things still aren’t perfect. Imogene still struggles with early wake-ups or getting up at night, every few nights. The most important thing we are doing is being consistent in our response. We always make sure she goes straight back to bed, and we don’t allow her to get into bed with us EVER. We walk her back to bed, or walk her to her doorway and watch her get back into bed. We give her a quick reassurance, “You’re safe, and you can do this. I love you, goodnight,” and we leave the room. I know over time our consistency will help her gain the confidence she needs to stay in bed.
Securing the Door: Many folks choose to secure the door of their toddlers room to keep them in at night, and this can be a really good option.
We chose not to secure Imogene’s door for a few reasons
1) the way our house is set up we have a super secure baby gate blocking off the bedroom area from the rest of the house, so if Imogene does get out of her room, the only place she can go is to the bathroom or one of the other bedrooms.
2) Imogene has a sensitive temperament, having the door cracked open made her feel safer, and actually resulted in less disruptions, when we did try a safety knob on the door to keep her from opening it, this led to more panic and disruptions.
3) Imogene is learning to use the potty at night and we wanted her to have access to the bathroom, which she does use on occasion in the night without much disruption.
4) For our parenting style and preferences a lock on the door just didn’t feel like what we wanted to do, but if things change in the future, it might be something we try in order to protect Imogene’s overall wellbeing and safety. I know for me if she were ever to go into her baby brother’s room, securing the door would be implemented immediately.
Reasons I would advise securing the door:
Your child has a mischievous temperament and tends to get into things that could potentially harm them, or keep their other siblings awake
You have no way of limiting their access to the house at large
Your child is under three years old and doesn’t have the ability to practice restraint (for some kids this could be as old as five years old, as it will be based on your child’s personality and temperament)
You feel better about it as a parent! (Guess what? You get to decide what works for your family!)
When making the decision whether or not to secure your child’s door the main things to keep in mind are safety (is my child safe if they can get out of their room?) and comfort (am I providing enough support and comfort to my child when I am securing the door). Remember when we are securing the door, we are still providing comfort measures to the child to build up that sense of confidence around sleeping in their bed. If you don’t want to lock the door I like these three options:
1) a child proof door knob cover, easy to install and remove whenever you want
2) a “monkey-latch”, you can install this device so that you can still leave the door cracked open for your child, which is really helpful for some children. They just can’t get all the way out.
3) a baby gate in the door; although this doesn’t work too well with strong-willed children who tend to learn quickly how to climb over it!
Need More Support?
Whether you have a toddler or a preschooler, you’ve made the switch to the bed or you’re still in a crib; it is possible to sleep-train and improve your child’s sleep and yours! If you need more support book a free discovery call https://calendly.com/slumberbunnies/discoverycall or check out our sleep packages at slumberbunnies.com/sleep-packages. When they sleep, you sleep!

Preparing your toddler for a new sibling
If you have a toddler and you’re expecting a new baby soon, you’re probably wondering what you can do to prepare your toddler for the arrival of their new brother and sister. I know I felt a lot of mixed emotions while I was expecting my son. I was worried my daughter would feel neglected by me when he arrived, I worried that it would change our bond. While our household dynamic has changed, I am happy to report that our bond is just as strong as ever. What’s even more gratifying is seeing the bond that Imogene shares with her little brother. The affection she holds towards him is truly amazing to see. In this blog post I’ll talk about some of the things we did to prepare our toddler for the arrival of our son, Arthur; both practically and emotionally.
Involve Your Toddler in Setting Up the Baby’s Room
One of the things that really helped Imogene understand that a new baby was on the way, was being involved in setting up the nursery. We let her “help” build the baby’s crib, and we had her pick out books from her book shelf that would be good for the baby to have on his shelf. I showed her the bassinet and explained that babies need to be very close to their mommies when they are first born, and showed her where the baby would sleep in our room. She was excited to see that the baby would have the same nightlight/sound machine as she had. We would often spend time in the nursery talking about what it would be like when the baby arrived. Many of the baby’s things were her old things, so we talked about how cool it was that she got to pass down her old things to the baby.
Look at Pictures of Your Toddler as a Baby
One thing we loved to do together was look at pictures of Imogene as a baby. We showed her pictures from the hospital, and images of our first days at home together. I showed her pictures and videos of her nursing and contact napping. This gave me an opportunity to show her that she got all the love and attention and care that her baby brother would soon need. It also helped her visualize how tiny the baby would be; and what she could expect from day to day life. I shared with her how special it was for me to have all those precious memories of her as a baby, and how exciting it would be for us all to welcome a new baby into our home.
Give Your Toddler Responsibility
We shared a lot with our daughter about how the baby wouldn’t just be mommy and daddy’s baby, but he would be her baby too. He would need her to show him and teach him so many things! I also talked about how Mommy would need a lot of help. Once he was born I recruited her in doing all kinds of simple tasks to help me such as fetching me a spit-up cloth, bringing me my nursing pillow, picking out socks for the baby, and helping me bathe him. Being involved in the care for her brother gave her quality time with me, and seemed to reduce any sort of jealousy. I think sharing the responsibility for her brother really instilled in her a lot of affection for him.
Sibling Gifts
It’s a really nice idea to let your toddler pick out a special birthday gift for their new sibling. We let Imogene pick out a special toy and outfit for her baby brother. In addition, a big brother or sister gift is really great too. We got Imogene a special “big sister” shirt (which is still one of her favs).
Read Books
Another thing we did to prep our daughter on the arrival of our son was to go to the library and check out books on expecting a baby, becoming a big sister, etc. Here are some of the books we read together:
You’re Getting a Baby Brother by Sheila Sweeny Higginson (there is a sister version too!)
I have a Brother by Smiljana Coh (there is a sister version too!)
The Berenstain Bears New Baby by Stan Berenstain
Waiting for Baby by Rachel Fuller
There were more that I can’t remember! You can find a plethora at your local library, just ask your librarian for some recommendations.
If your Toddler is Ready, Potty Train
At the time of my pregnancy I was still working in the public school system, and so I had the summer off. Because Imogene would be about 2.5 in the summer, and she was showing all the signs of being ready for it, I decided to go ahead and potty train her. I am so happy I made this decision. It made my life so much easier when her brother arrived in October. For us, we kept her in a diaper at night because she was still in a crib (more on that in the next section), but we got her out of diapers completely within a week, and having that behind me was such a load of my mind and my plate! Of course this is totally dependent on your schedule and the age and development of your toddler, but if you can manage it, you’ll feel better going into the birth of your second child if your first child is potty trained.
Deal with Unresolved Sleep Issues
Imogene was always my good night-sleeper, and therefore I never had to sleep train her, but when she turned two she had a major sleep regression. Instead of falling asleep within 5 minutes, just talking to herself in the crib, it was taking us up to two hours to get her down at night. We frequently had to read or sing to her until she fell asleep, or lay with her in the twin bed in her room and then move her into her crib. She also began waking up at 5:30 in the morning! I’m embarrassed to admit we let this go on for a few months before we did anything about it, hoping it was just a regression and would correct itself. The further I got along in my pregnancy the more clear it became that I could not have a toddler who was not sleeping well; and still function! Rick and I also wanted our evenings together back. We decided it was time to sleep train and it was the BEST decision we could have made. We set a 30 minute routine in place that Imogene was actually excited about, and we used a sleep-training method consistently for two weeks. By day 7 she was falling asleep within 10 minutes, going to be earlier than she ever had before (between 7:30-8 depending on the length of her nap that day) and sleeping in until 7:15/7:30 every single morning! If your Toddler is struggling with sleep issues, don’t wait months to fix it like I did! You can address it now, and be seeing success within two-three weeks! It is possible. I have Toddler Packages available at www.slumberbunnies.com/sleep-packages, or you can start by booking a discovery call at calendly.com/slumberbunnies .
Buy a Second Crib!
Don’t be tempted to fall into the trap of putting your child in a toddler bed or “big kid” bed before the age of at least three either. We tried putting Imogene in her twin size bed, because like so many people we wanted to use her crib for the baby. It did not work! Kids this age are not developmentally ready to navigate when to stay in bed vs. when it’s okay to get up. She was up several times a night when we tried to put her in the bed, but when we let her sleep in her crib she slept 11 hours straight every single night. A second crib is worth every penny you will spend on it! We found our son’s crib second-hand on facebook marketplace for a great price, and it’s in perfect condition. Do some bargain shopping! We got a nice brand of mattress for a discount on Amazon because the packaging was damaged. It was 40% off and nothing was wrong with it but the packaging! You can find deals if you are worried about the money, but trust me, it’s an investment you’ll be so glad you made.
Enjoy the One on One time with Your first Baby
Your first baby will ALWAYS be your baby, but the fact of the matter is, life is going to change when the new baby arrives. You will never get the time back when it was just your first. Soak in every minute! Take time to do some special activities together. Indulge in all the extra snuggles and bonding time. Of course you will want to make time to spend one on one with your firstborn after baby comes, but those first few months are difficult, so make the most of your time now!
If you are reading this and you are expecting a second child soon, I am so happy for you! I wish you the best in the rest of your pregnancy and the birth of your child. Parenting two is quite the transition and it is TOUGH STUFF sometimes! Please reach out to me; not just for sleep stuff, but if you just need some support. Seriously DM me, book a discovery call just to vent (yea we don’t even have to talk about sleep), whatever! Supporting other moms in this journey will always be time well spent for me!
Should I use incentives?
If you are trying to achieve better sleep results for your toddler or “big kid” you may be considering adding incentives as part of your plan. In this blog post I dive into my thoughts on incentives, when they should be used, how they should be used, some examples of incentives, and when to AVOID using incentives.
What is an incentive?
Simply put an incentive is a small reward that your child can earn by completing a desired action or exhibiting a desired behavior. For example, while we were potty training our daughter we gave her a sticker for every time that she successfully used the potty. She liked to put her sticker on the potty which was fine with us! As the potty became a normal part of her routine the stickers naturally became phased out. She stopped asking for them, and we stopped offering them.
Some Basic Guidelines for Incentives
Incentives should be meaningful to your child. Choose an incentive they are motivated by.
Incentives should be sustainable. Choose an incentive you can afford to give your child on a daily basis; usually incentives should be small enough that the child doesn’t care all that much when they are phased out.
Incentives should be fitting to the level of effort you are asking your child to put in. Giving a sticker for when your child finishes brushing their teeth is appropriate, while giving a sticker when your child sleeps through the night is too small of an incentive to match the behavior.
Incentives should not be given without clear expectations and guidelines on how to earn the incentive. You must be consistent with this, don’t change it day to day, and definitely don’t give the incentive if the goal was not met. An example of a clear incentive would be “You can earn a sticker each time you use the potty and wash your hands” or “you can earn a penny every time you pick up your toys and put them away before bed.”
When not to use incentives:
Do not use an incentive with a child that is too young to understand how to earn the incentive, or why they are earning the incentive
Do not use incentives with children who are super-incentive driven (I know this sounds counterintuitive). We want these children to develop intrinsic motivation, or the desire to do something for the pride of doing it. These kids will also react negatively when you phase out the incentive and will regress in behaviors. In addition, if the child loses the incentive for the day, they will have no motivation to meet your expectations once the incentive is taken off the table. This child will also likely throw a huge tantrum if they don’t earn their incentive. For children who are motivated by self-pride, parental praise, and learning new things, an incentive is simply a cherry on top; this is the right child for incentives.
Do not offer incentives for things that the child is not developmentally ready to do! For example, if your child has been co-sleeping, it is unfair for you to offer them an incentive for sleeping in their bed all night, because it is highly unlikely they will be able to do that successfully without a lot of coaching from you. For another example, an 18 month old shouldn’t be offered and incentive for using the potty when they may not be showing the signs of being developmentally ready to be potty trained.
Do not use an incentive as your ONLY method of training your child on a new skill or behavior. Learning to sleep independently takes careful planning and practice. It requires a lot of help from you, the parent. Offering an incentive with no other plan of action is going to do nothing for you, but frustrate your child and you!
When to use incentives:
Your child is developmentally ready for the skill or behavior you are asking them to exhibit
You have clear expectations on how to earn the incentive which you’ve communicated MANY times to the child, and practiced
You have an entire plan in place to help your child gain the skill, and the incentive is just a single part of that plan
Your child is already intrinsically motivated to learn the skill, and the incentive is just the cherry on top
You have a single action/behavior you want your child to complete to earn the incentive and the effort matched the reward.
Incentives Ideas:
Stickers
Pennies
Extra time doing something they enjoy (preferably NOT screen time)
For big accomplishments you could let your child pick out a special outing for the family, or choose the dinner menu for a celebratory meal at home
Do you have to use incentives? Absolutely not. In fact, sometimes…many times, they do more harm than good. But, if you are going to use incentives be very thoughtful about how you implement them. Remember, incentives alone do not a sleep plan make! If you are struggling getting your toddler or school aged child to sleep through the night, it might be time to enlist a sleep coach! You can book a free discovery call with me https://calendly.com/slumberbunnies/discoverycall, and you can check out my sleep-packages at www.slumberbunnies.com/sleep-packages.

COLIC: PRODUCTS
Products we tried to help relieve colic symptoms.
There are a lot of products on the market intended to help soothe a collicky baby. I tried a number of them, along with some general use baby items that happened to be helpful for my guy. I will provide an overview of our experience here and describe how useful each product was.
Mylicon- Simethicone drops are an over the counter medication marketed to help treat discomfort from infant gas. These were recommended to us by our doctor, our lactation consultant, and our midwife. We used these drops a few times a day (the bottle says you can use them up to 6 times per day, while our doctor advised using them only twice a day, we probably never used them more than three times a day). I feel like these drops were somewhat helpful. I feel like the act of dosing the drops itself had a calming effect on our baby if he was crying. Most people know that gas medications aren’t as useful for breaking up gas bubbles as actual movement is, so baby massage, leg presses, and advantageous positions such as squat like positions and tummy time, were probably more helpful than these drops. But, I do feel they at least gave me a placebo effect to feel like I was doing something to help my son in the throes of his gas pain. Since we used them minimally and were recommended by our doctor, I felt pretty safe using them. However, I know some folks will choose never to medicate their child, unless absolutely necessary. In retrospect, they were probably minimally useful.
Gripe Belt- A gripe belt is a soft belt that can be wrapped around baby’s middle and contains a soft clay insert that can be heated briefly in the microwave to provide warming comfort. I am a lady who quite likes a heating pad or rice bag when I have period cramps or a backache, so this product made a lot of sense to me. I found it did have quite a soothing effect when combined with a pacifier and a contact nap; however it did lose heat quite quickly. I do think the weight of the belt itself also had some soothing effect. Since it is a rather cheap solution, I think it is definitely worth a try if your baby is colicky. We bought the Doctor Brown’s version on Amazon and it ran about $14. Overall I found it to be one of the more useful products we tried to soothe our babe.
The Burplee Pillow- I got suckered into this purchase through an instagram ad. This pillow claims to help babies get burps out and save your shoulders. It’s apparently designed to mimic the feel of baby being up on your shoulder. It’s got memory foam, a steep incline, divots for the head and arms, and stretchy cover. It was pretty pricey, about $50. Honestly, this product was a total waste for me. My son screams on it, and it's so steep that it doesn’t really work for an infant. I’m hoping he might enjoy it more when he’s bigger. He much prefers tummy time on my boppy nursing pillow, which I already owned.
The Merlin Sleep Suit- This puffy little “Michelin Man” suit runs about $40 dollars on Amazon. It was recommended to us by our lactation consultant who had used one for her colicky daughter. I will admit this suit seemed to make Art feel nice and cuddled and secure. However, I now wish we’d never put him in the thing, as it has become a sleep crutch! This suit acts similarly to a swaddle in that it limits the amount of movement a baby has in the crib. This can be an issue when baby begins to roll! Since Art is now getting to the stage where he will soon be rock n rolling, we need to transition him to a sleep sack, and I am wishing we would have done this right from the start!
The Moby Wrap I had the Moby wrap gifted to me when my daughter was born, but I think I only used it like one time? My daughter found it constricting and she never liked to be swaddled or wrapped up tightly. For my son it was an absolute god-send. This thing saved my life! Art loved being wrapped up in this thing and held super tightly to my chest. Sometimes it was the ONLY thing that would console him. It also made my blood pressure go down, just feeling him cozy against me, and watching him become sleepy and relaxed. This worked well for Art until he hit about 3 months of age, and outgrew it.
The Ergo Baby Carrier This carrier is also great, and we are still using it with Art. We also used it a ton with our daughter, who had hip dysplasia, and the doctor actually said it helped correct her hip alignment! This product is more versatile as it can be used with the baby facing out or towards you, and the newborn insert allows you to use it when baby is still tiny. I will always swear by this tried and true product. While I think the Moby was still a little more comforting to my colicky guy, we are still using this one plenty. It’s also a little more handy for going on walks and things like that; a little more kind to your back!
MAM Pacifier Of all the pacifiers out there, my babies always enjoyed the MAM paci’s the best. Paci’s can help reduce the risk of SIDS, and sucking is a natural pain reliever for babies. Yes, pacifiers can become a sleep crutch, but crutches and habits can always be broken. This was one of our number one tools for comforting Art, and we are still keeping the Paci in play at 4mo. Luckily, Art usually drops his paci shortly after falling asleep, and he doesn’t require it being replaced, which is a big plus for us!
Fisher Price Swing The Fisher Price swing was also gifted to us when our daughter was born. She didn’t use it much at all. At 4 months, Art has pretty much grown out of using this. It was helpful towards the beginning when he would wake up with gas pains, the rocking motion settled him. We always made a point to turn off the rocking motion after he fell asleep, so that he wouldn’t become too accustomed to having motion while sleeping. There were definitely a few times where the swing came to the rescue, however, I don’t know that it would be worth it to me to purchase this product on my own. Swings can definitely become a sleep crutch for some babies, so I would recommend to use it sparingly and keep it on lower motion settings.
There are so many things out there for colicky babies, and a lot of it can be a real waste of your money! My take: invest in a great baby carrier! It will get you the most mileage. Don’t worry too much about the pacifier being a sleep crutch in the early days, but be wary of specialty sleep sacks and swings, because these habits can become much harder to break. If something is fairly inexpensive (like the gripe belt) why not give it a try and see if it helps your baby? But when it comes to fancy colic seats and pillows, they probably aren’t worth the money. At the end of the day skin to skin contact is the most soothing thing for your baby, and most likely for you as well. Don’t forget to take breaks and switch off with your partner. It’s okay to need some time without a baby on you! Remember, it’s not forever, it’s just for now. My heart is with you!

Colic: Interventions
Interventions we tried to help relieve colic symptoms.
Interventions we Tried for our Colicky Baby
Elimination Diet- when I was nursing my first child, I found that she had a sensitivity to dairy in my milk. When I cut dairy from my diet, her distress was pretty much eliminated. I was hoping the same solution would work for Arthur. Per my midwife’s instructions I cut out dairy, soy, gluten, and eggs for a full two weeks. I was mostly eating fresh vegetables and protein. Over the course of the two weeks I didn’t experience much improvement in Art’s crying. However, when I added soy back into my diet, his crying felt worse to me. I decided to remove soy from my diet and I am currently still soy free. It was interesting to see how much sneaky soy is in everyday products like sliced bread, chocolate, and pretty much any processed foods. I am not sure if cutting soy really helped Art, but it certainly forced me to eat a cleaner, more whole foods diet, which I think was, in turn, great for my son.
Chiropractic Adjustment- One of the first suggestions we got from our midwife was to see a chiropractor. I took Art to the chiropractor that I had been seeing during my pregnancy. Shout out to (Lyken’s Chiropractic in Winchester, VA) He got several adjustments over the span of a couple of weeks. These adjustments were super gentle, and often done while I was holding the baby to my chest. It’s hard for me to tell if the adjustments made a big difference. I often felt that Art would have a nice bowel movement and seem more relaxed in the hours following an adjustment, however, I do not know that they had a long term effect. For our family, it just wasn’t in the budget to continue having several adjustments a week, and he didn’t seem to have any physical restrictions or major birth injuries, so we discontinued adjustments after about two weeks.
Cranio-Sacral- our Chiropractic office also had a Cranio-Sacral therapist. Arthur had two Cranio-Sacral sessions that were about 15 minutes each. Cranio-Sacral therapy has to do with the natural electric system within the body. The therapy is meant to work out the kinks in the system, so to speak, so that the body’s circuitry can flow in harmony. It's a very gentle therapy that consists of placing the fingers very lightly on certain points of the body. The therapist is feeling for pulses to indicate healthy movement in those areas. These sessions seemed very calming to Art, but it’s hard to say if it wasn’t just the dimly lit room, calming music, and warm massage table. I will say I experienced a sense of deep calm during these sessions, just from being in the serene atmosphere. We discontinued these sessions along with the Chiropractic, again for mostly financial reasons, and because we had no tangible evidence of their long term benefits. However, I did learn that moving Arthur into a dark and peaceful room, was helpful during his colicky episodes, as was heat, which I will discuss more later. Perhaps it’s worthwhile to note that if I had endless funds, I would have kept up with both Crano-Sacral and Chiropractic therapies, because they seemed to have a calming effect in the moment and for a few hours after each session, and I felt they couldn’t hurt. However, with our budget, it wasn’t reasonable to continue with these.
Lactation Consultant- We saw a lactation consultant when Art was three weeks old to see if the source of his colic might be feeding related. Our lactation consultant was able to observe that Art was often “popping off” my breast, and that each time he broke suction he was taking in air, causing an increase in gasiness. She also pointed out a tongue and lip tie. Tongue and lip ties are restrictions in the mouth that can make it more difficult for a baby to maintain a proper latch. This can lead to poor transfer of milk, nipple pain, and gas. After seeing lactation we decided to get Art’s tongue and lip tie released.
Frenectomy- We took Arthur to a pediatric dentist (Shout out to Tooth Clues in Leesburg, VA) to have his tongue and lip tie addressed. Our daughter also had a tongue tie, but she was referred to an Ear, Nose, and Throat doctor for her revision. They simply cut the tie with a scalpel and sent us on our way with no post-op instructions or stretches. As a new mom I was none the wiser. I continued to struggle with nipple pain until my daughter was about 4mo, likely because her tongue tie probably just grew right back. This time our lactation consultant instructed us to find a dentist who would use a laser to make the revision, and who would perform a “diamond cut” release. Our dentist was extremely thorough in her post-op instructions. After the releases we had to do lip and tongue stretches (3 different stretches for each) at least 6 times a day for at least 6 weeks! We ended up having to do them for closer to 10 weeks total. Art also had a follow up at one week and one month to assess his progress. Art’s latch did improve, as did his milk transfer. Sadly his gassiness and crying did not improve. The hardest part of this whole process was conducting the stretches, which seemed to be very painful for our baby. It was really hard to commit to doing the stretches because I felt like I was putting my child in distress, but we were warned that if we didn’t do the stretches faithfully, his ties would grow back stronger. Looking back at all the interventions we did for Arthur, this was by far the hardest. It was also around $700 for both procedures. Arthur is now 4 months old, and even with all the stretches I feel that his tongue tie has grown back some, but I still feel it is better than what he had before. Tongue and Lip restrictions can lead to problems later in life, especially with speech. I suppose it was worth it to get these addressed, but I would not want to go through it again. If you are in the thick of tongue and lip tie stretching; I see you!
Reflux Medications- after discussing Art’s behavior with his doctor, our doctor suggested that Art might have reflux. I was reluctant to put him on medication but since I had already tried an elimination diet, and the tongue/lip revision, I was willing to try this. He went on a small dose of Famotidine, which he took twice a day. I do feel this medication was a step in the right direction. Shortly after starting it I saw less fussiness at the breast, easier put-downs for naps and nighttime sleep, and longer stretches of happy phases before crying. I think some of those longer stretches were simply developmental, but I do believe the reflux medication has been helpful for Arthur.
Over this time period I was desperate to “cure” my baby of colic; and while all of these interventions probably didn’t hurt, none of them were a silver bullet. I had many moms express to me that there is only one thing that cures a colicky baby, and that is time. In time, babies develop and grow, and overcome colic. As a parent, I am constantly learning that I have little control over most things. It is our natural instinct to do everything in our power to keep our babies from pain, but sometimes we just can’t. I have also learned that my son cries when he is bored. He's a baby that loves to be near people. He loves direct eye contact. He loves new scenery. While I could sit my daughter in her bouncer and she would happily watch me clean the house and work out, Art is just not that baby. He wants to be worn, he wants to be constantly talked to, he wants me to stare deeply into his perfect eyes; and as his mom, I comply. This is just the season of life we are in. If you are struggling with a colicky baby, just know that you are not alone! You are doing all you can for your little one, but you can’t always “fix” it. Try to let go just a little bit, and let time do some of the work.

when colic comes a calling…
My journey with a colicky baby.
While I was pregnant with my second child, I told myself a story about what postpartum was going to be like. I was an experienced mom of a toddler and had been “through it all”. My husband was working for a new company that allowed him to take 3 months of paid maternity leave, so he was going to be home with me. Postpartum this time around was going to be a breeze, a vacation almost! My husband and I spent time talking about the long walks we would take with the new baby, how we would give each other time to work on personal projects during maternity leave, and how easy sleep would be now that I was a certified sleep consultant.
The first two weeks after my son was born were pretty magical. He was born in October, but the weather was unseasonably warm. We spent many sunny afternoons nursing on the front porch and enjoying a mild breeze. Art slept almost all day, waking only to nurse. He was a snuggly, sleepy little angel. And then we hit the end of week two and it was like a bomb went off in our house. Suddenly Art went from napping two hour stretches to napping for about 40 minutes. When he wasn’t sleeping or napping he was screaming; earsplitting cries. He was extremely gassy, oftentimes his belly would be rock hard, and he would be arching his back in pain. I felt totally lost as to how to console him. Oftentimes there was nothing I could do but swaddle him as tightly as I could and rock him, while holding a pacifier in his mouth until he would finally pass out. Then he would wake up and we’d repeat the whole scenario.
It broke my heart when we were trying to eat dinner and he would be crying, and my toddler would say “it’s too loud mommy!”. It broke me to see him in pain. I started to do any and everything I could think of to find a solution to my poor collicky baby. In this series of blog posts I’ll share with you all the things our family tried to help our collicky boy, some that worked, and some that didn’t. I’ll talk about the products, practices, and medical interventions we tried.
While it has gotten easier, Art is 4 months old now, and he is still a difficult baby. Everyone told me colic goes away by 12 weeks, but we’re still experiencing phases of inconsolable crying. I have to remind myself “it’s not forever, it’s just for now”. If you’re in the thick of it too, I hope you’ll follow along on this journey with me!

Hi, I’m Rebecca
Get to know your Slumber Bunnies Coach, Rebecca Shannon.
Hi there, I’m Rebecca Shannon, owner of Slumber Bunnies and head sleep coach. I wanted to share a little more about myself and my journey to getting here!
My Background
My background is in education. I hold a Master of Teaching from VCU, and I started out as an English teacher in 2014. I taught 6th grade English for three years before obtaining my endorsement as a school librarian. Since then, I have been an elementary, middle, and high school librarian. So I’ve gotten to work with students of all ages! I still hold a teaching license in VA, and stay active in public school education by substituting. I will always have a huge heart for teachers and their families, because I know how hard teachers work to serve families!
My Motherhood Sleep Journey
I had my first daughter in 2021, and got to experience all of the ups and downs that come with being a working mom. At the time I had no clue what I was doing with sleep! I remember just pushing her in the stroller around and around the house trying to coax her into napping. I never did get my first on a regular napping schedule. At night we would nurse to sleep, and when we weaned from nursing we would rock to sleep. Luckily, she slept pretty well through the night, so we thought if it’s not broke, why fix it? Then around 18 months her sleep started to decline. We were spending hours singing, reading, rocking her to sleep before transferring her into the crib. As she got closer to two years old she began to go to sleep later and later, while waking earlier and earlier. My husband and I had to switch being on “duty” for those difficult nights and mornings. We were losing ourselves, and we were losing each other!
We finally decided to get educated. We found a sleep coaching plan that worked for our daughter. The process for us took about a week, and the transformation was incredible! We could now put our two year old in her crib, awake, at 8pm and she would sleep through the night until 7:30am. It honestly felt like getting our lives back! Which we needed because we were expecting our second child at the time.
As a librarian, research is one of my passions. I became fascinated with infant sleep, and I started to read everything I could on the topic. I also began looking into starting a career as a Sleep Consultant. In the year leading up to my son’s birth, I became certified, and I’m now so happy to be beginning this journey as a work-from-home mom!
My son has been a whole different creature from my daughter. He’s a very colicky baby, and he is extremely alert. Because of my training, I knew the right moves to help condition him to be a better sleeper, so he hasn’t needed any formal sleep training yet. I have learned a whole lot about understanding sensitive babies, and I have done a lot of research on helping sensitive babies like my son, sleep well! All topics I’ll be covering in this blog.
My Sleep Philosophy
My philosophy is that everyone deserves and needs sleep. That includes you, Mom and Dad! It doesn't make you a bad parent if you want to sleep-train your child. There is a lot out there that demonizes the way we choose to deal with sleep as parents. You’re terrible if you sleep train, or your a fool if you co-sleep. The truth is, there isn’t one right way! Your child’s sleep plan should be unique to them; their temperament, development, and specific sleep troubles. Just as importantly, it should be unique to you, as the parents. It should honor your needs as well. The most important aspect of sleep-training is consistency, so I want to build a plan that you can get behind, and truly be consistent with. I will always be straightforward with you about my recommendations, the reasoning behind them, and what you can expect when you adopt a plan (how much crying you can expect, for example!).
The Purpose of this Blog
I’ll be updating this blog weekly to bring you sleep advice and parenting reflections, in hopes of reminding you that you’re never alone on this journey.